

PyファイルをEXEにする方法を紹介します。
EXEにすることでPythonをインストールしていない環境でも実行することが可能になります。
EXE化にはPyinstallerを用いて実現します。
Versions
Python:3.9.2
Pyinstaller:5.0.1
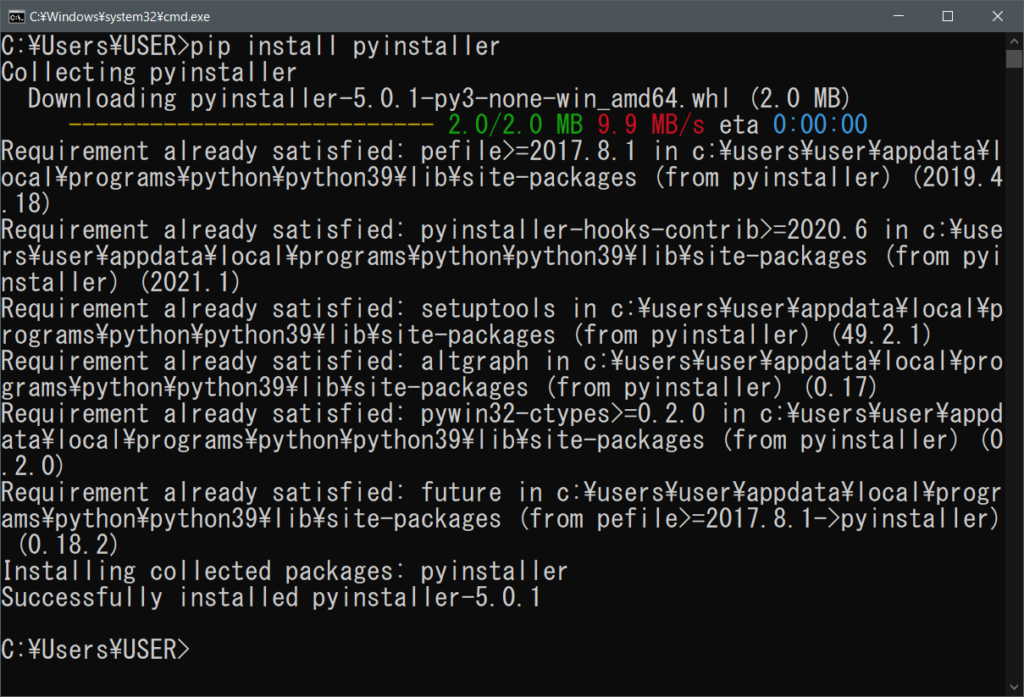
Pyinstallerのインストール
pipコマンドで以下を実行します。
pip install pyinstaller
Pyinstallerの実行
サンプルとして以下のPythonファイルをEXEにします。
import os
import glob

files_list = []

for file in glob.glob(input("検索したいフォルダパスを指定してください")+"\*.txt"):
    print(file)

os.system("PAUSE")
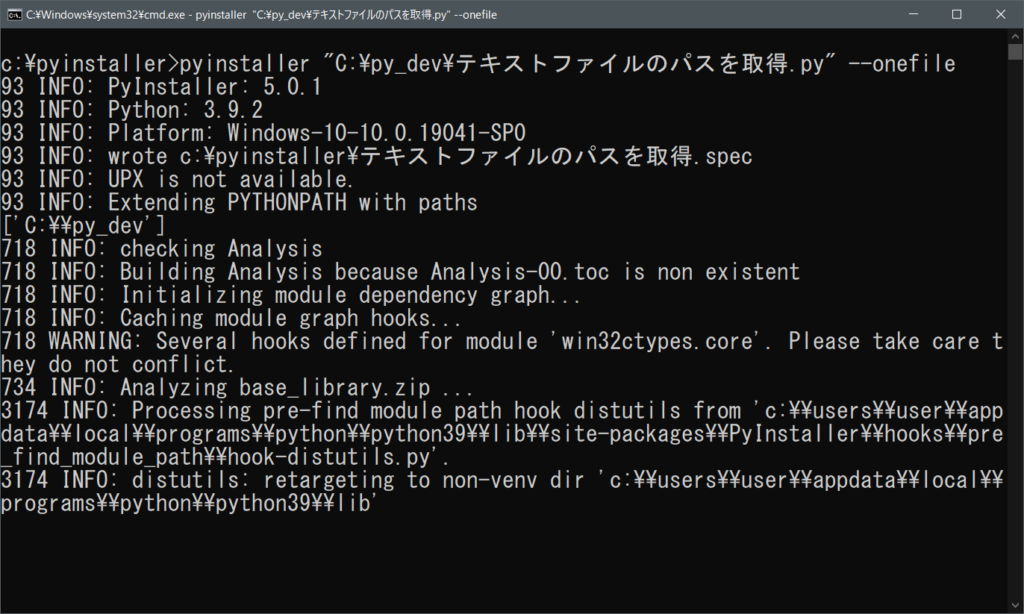
cmdを起動して、Pyinstallerを実行します。
(実行前にEXEを出力したいフォルダに移動してから実行してください)
pyinstaller “Pyファイルのパス”
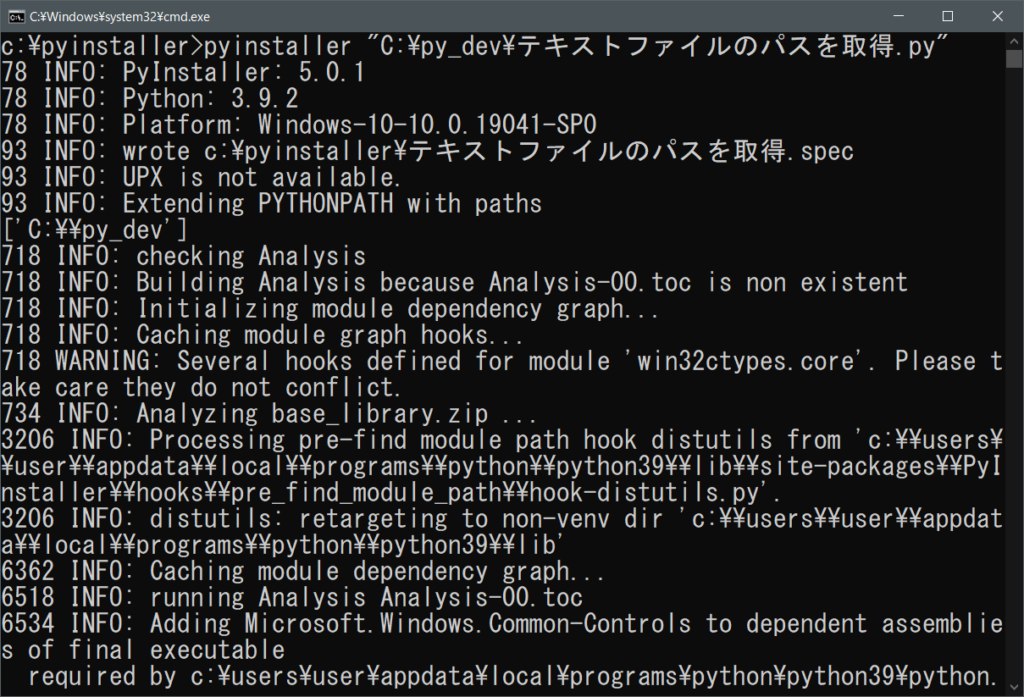
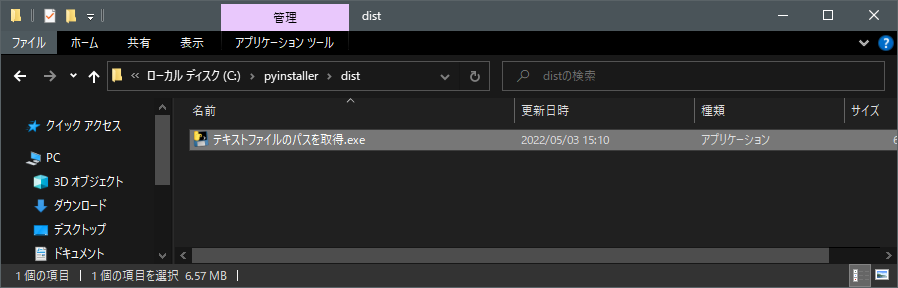
実行するとpyinstallerコマンドを実行したディレクトリに以下が出力されます。
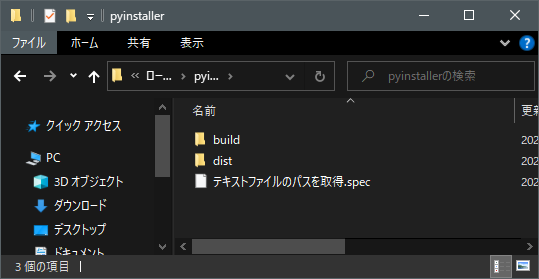
「dist」フォルダのpyファイル名のフォルダの中にEXEファイルと実行に必要なファイルが作成されます。
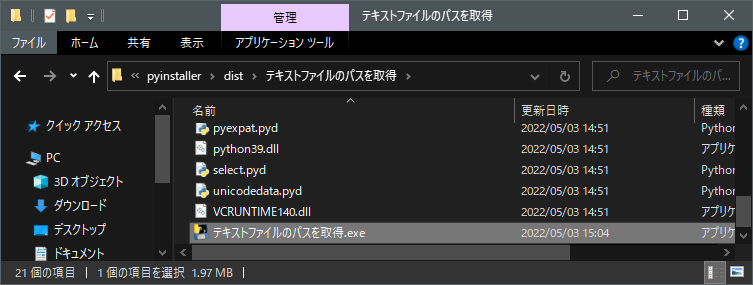
このEXEファイルを実行してみます。
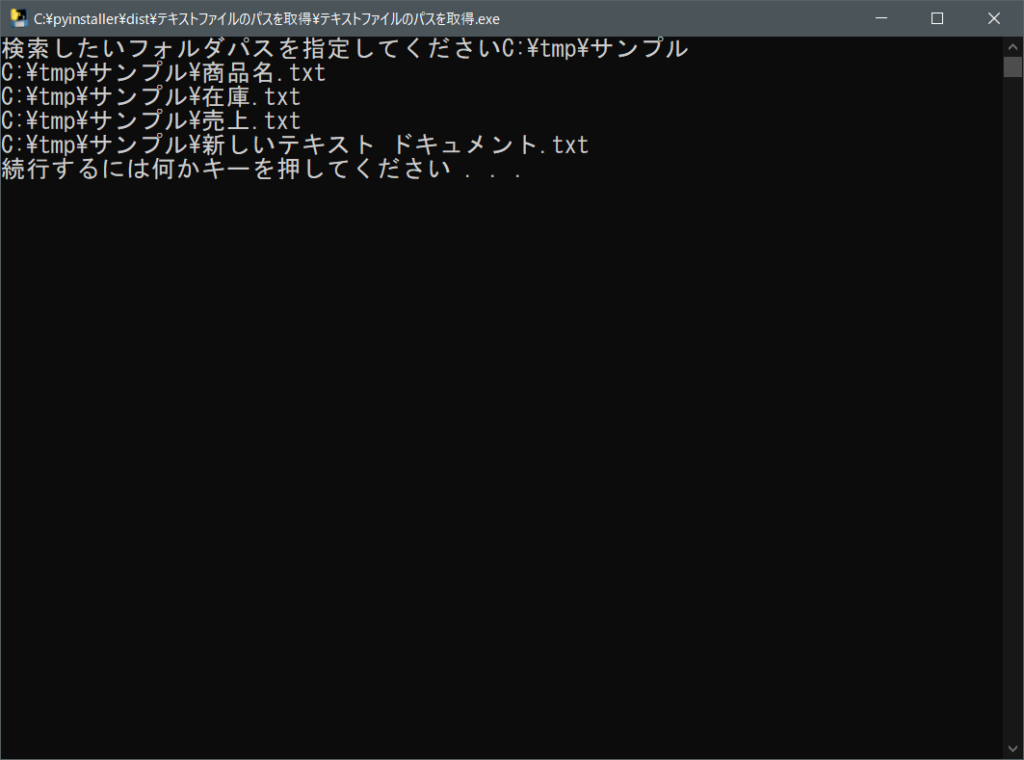
注意点としてはこのEXEファイルを違うフォルダやPCにコピーして実行しようとすると動かなくなります。
EXEファイルのみ共有して実行したいと考えている方は
Pyinstallerのオプションとして一つのファイルにまとめる[–onefile]を指定してみましょう。
pyinstaller “pyファイルパス” –onefile
[–onefile]を指定することで「dist」フォルダの中にEXEファイルがひとつだけ生成されます。
生成されたEXEをダウンロードフォルダに配置して実行します。
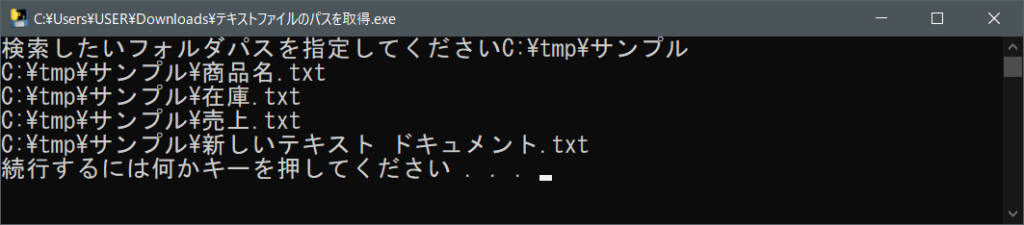
実行することができました。

コメント